Using Annotation for Bean Specification Part 4
Using Annotation for Bean Specification Part 4
Using Annotation for Bean Specification Part 4
Part 1 :Setting up a Maven Project on Eclipse in Linux Ubuntu Part 1
Part 2:Setup Spring Boot in Maven Project in Eclipse Part 2
Part 3 :Setting up Spring Application Specifying Application Context using XML Part 3
1. Change the Entry file to index.html
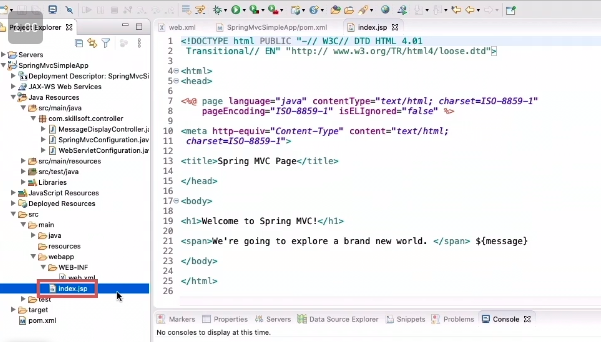
add the variabe
1
${message}
which will be replaced and rendered by the model
2. SpringMVConfiguration.java
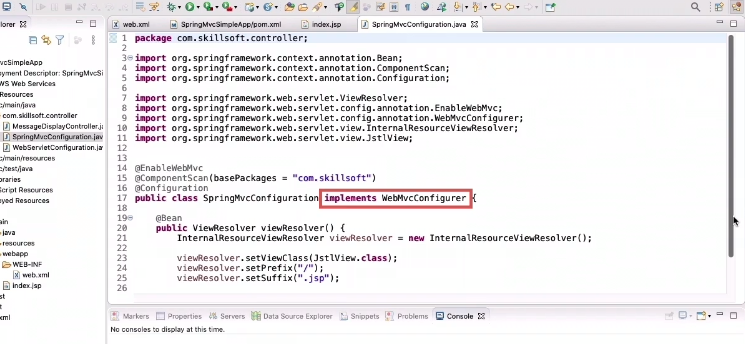
- implements WebMvcConfigurer interface , this interface has to be implemented if we want to use java based configuration for Spring MVC project rather xml based configuration for the servlet
1
@EnableWebMvc
- Enables programtic annotations for components which will be then injected into the application , it will enable java annotations to specify different components for spring Mvc application
1
@ComponentScan
- It tells the base package which it should start scanning for classes that have this annotations
- All classes defined into this base package will be scanned for annotations and those objects will be automatically be instantiated and injected into our application
1
@Configuration
- This tell springmvc this java class should be treated as programmatic configuration of our SpringMVC servlet
1
JstlViews.Class
- We will use JSP file with JSTL tags
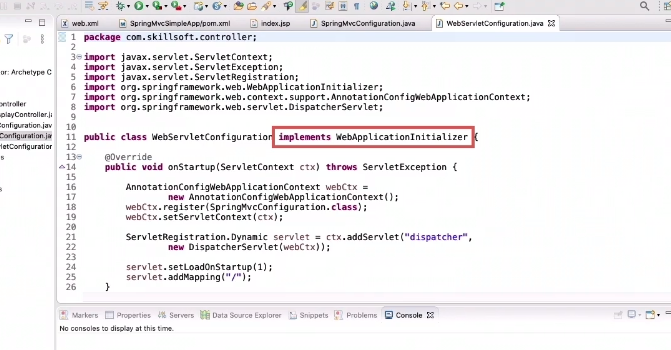
3. WebServletConfiguration.java
4. MessageDisplayController.java
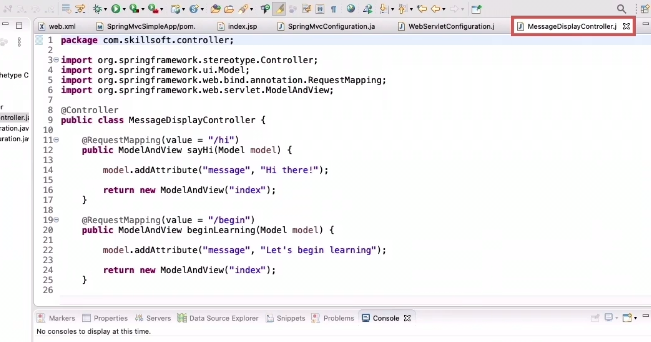
- Dosent implement the controller interface as we implemented in part 3
- Spring 3.0 Onwards just tagging it with @ Controller will get it done
Handler Mapping
- It maps a requests and incoming web request to a particular method which process the request and after performing the request it renders the view with the result
View Resolver
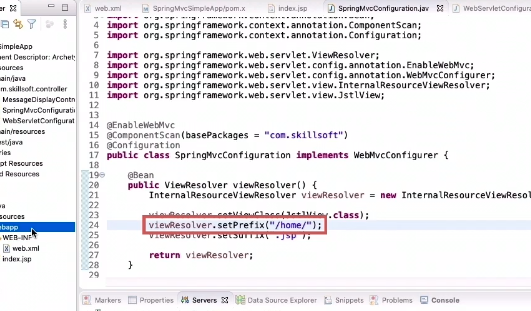
To direct our view resolver to look into folder home relative to the root directory , so create a new folder “ home “ and place the index.html into the home folder
5. Run Application
- Stop tomcat
- Clean server
- Clean Eclipse Cache
- Maven Build
- Run as » run on server
Run /hi or /begin
Reference
This post is licensed under CC BY 4.0 by the author.